This is the third of four blog posts about how we implemented a complex metadata mapping strategy within our enterprise. I was inspired to write these posts to help others use BA Insight metadata tagging products with SharePoint and SQL content. The internet does not have much out there to help people like us walk through real world scenarios on how these tools work together to create a desired solution.
Series of posts describing the Enterprise Metadata Tagging project:
- Enterprise Metadata Tagging – The Requirements
- Enterprise Metadata Tagging – The Setup
- Enterprise Metadata Tagging – The Implementation [This one]
- Enterprise Metadata Tagging – The Demo
This post will concentrate on how to implement this prototype solution using BA Insight tools. We will look at the configuration and implementation of the static taxonomy values using Smart Pipeline and AutoClassifier. Then we will check out how to create the dynamic taxonomy value configuration using Smart Pipeline and Custom Entity Extraction components. Lets walk through this prototype BA Insight implementation.
Component View
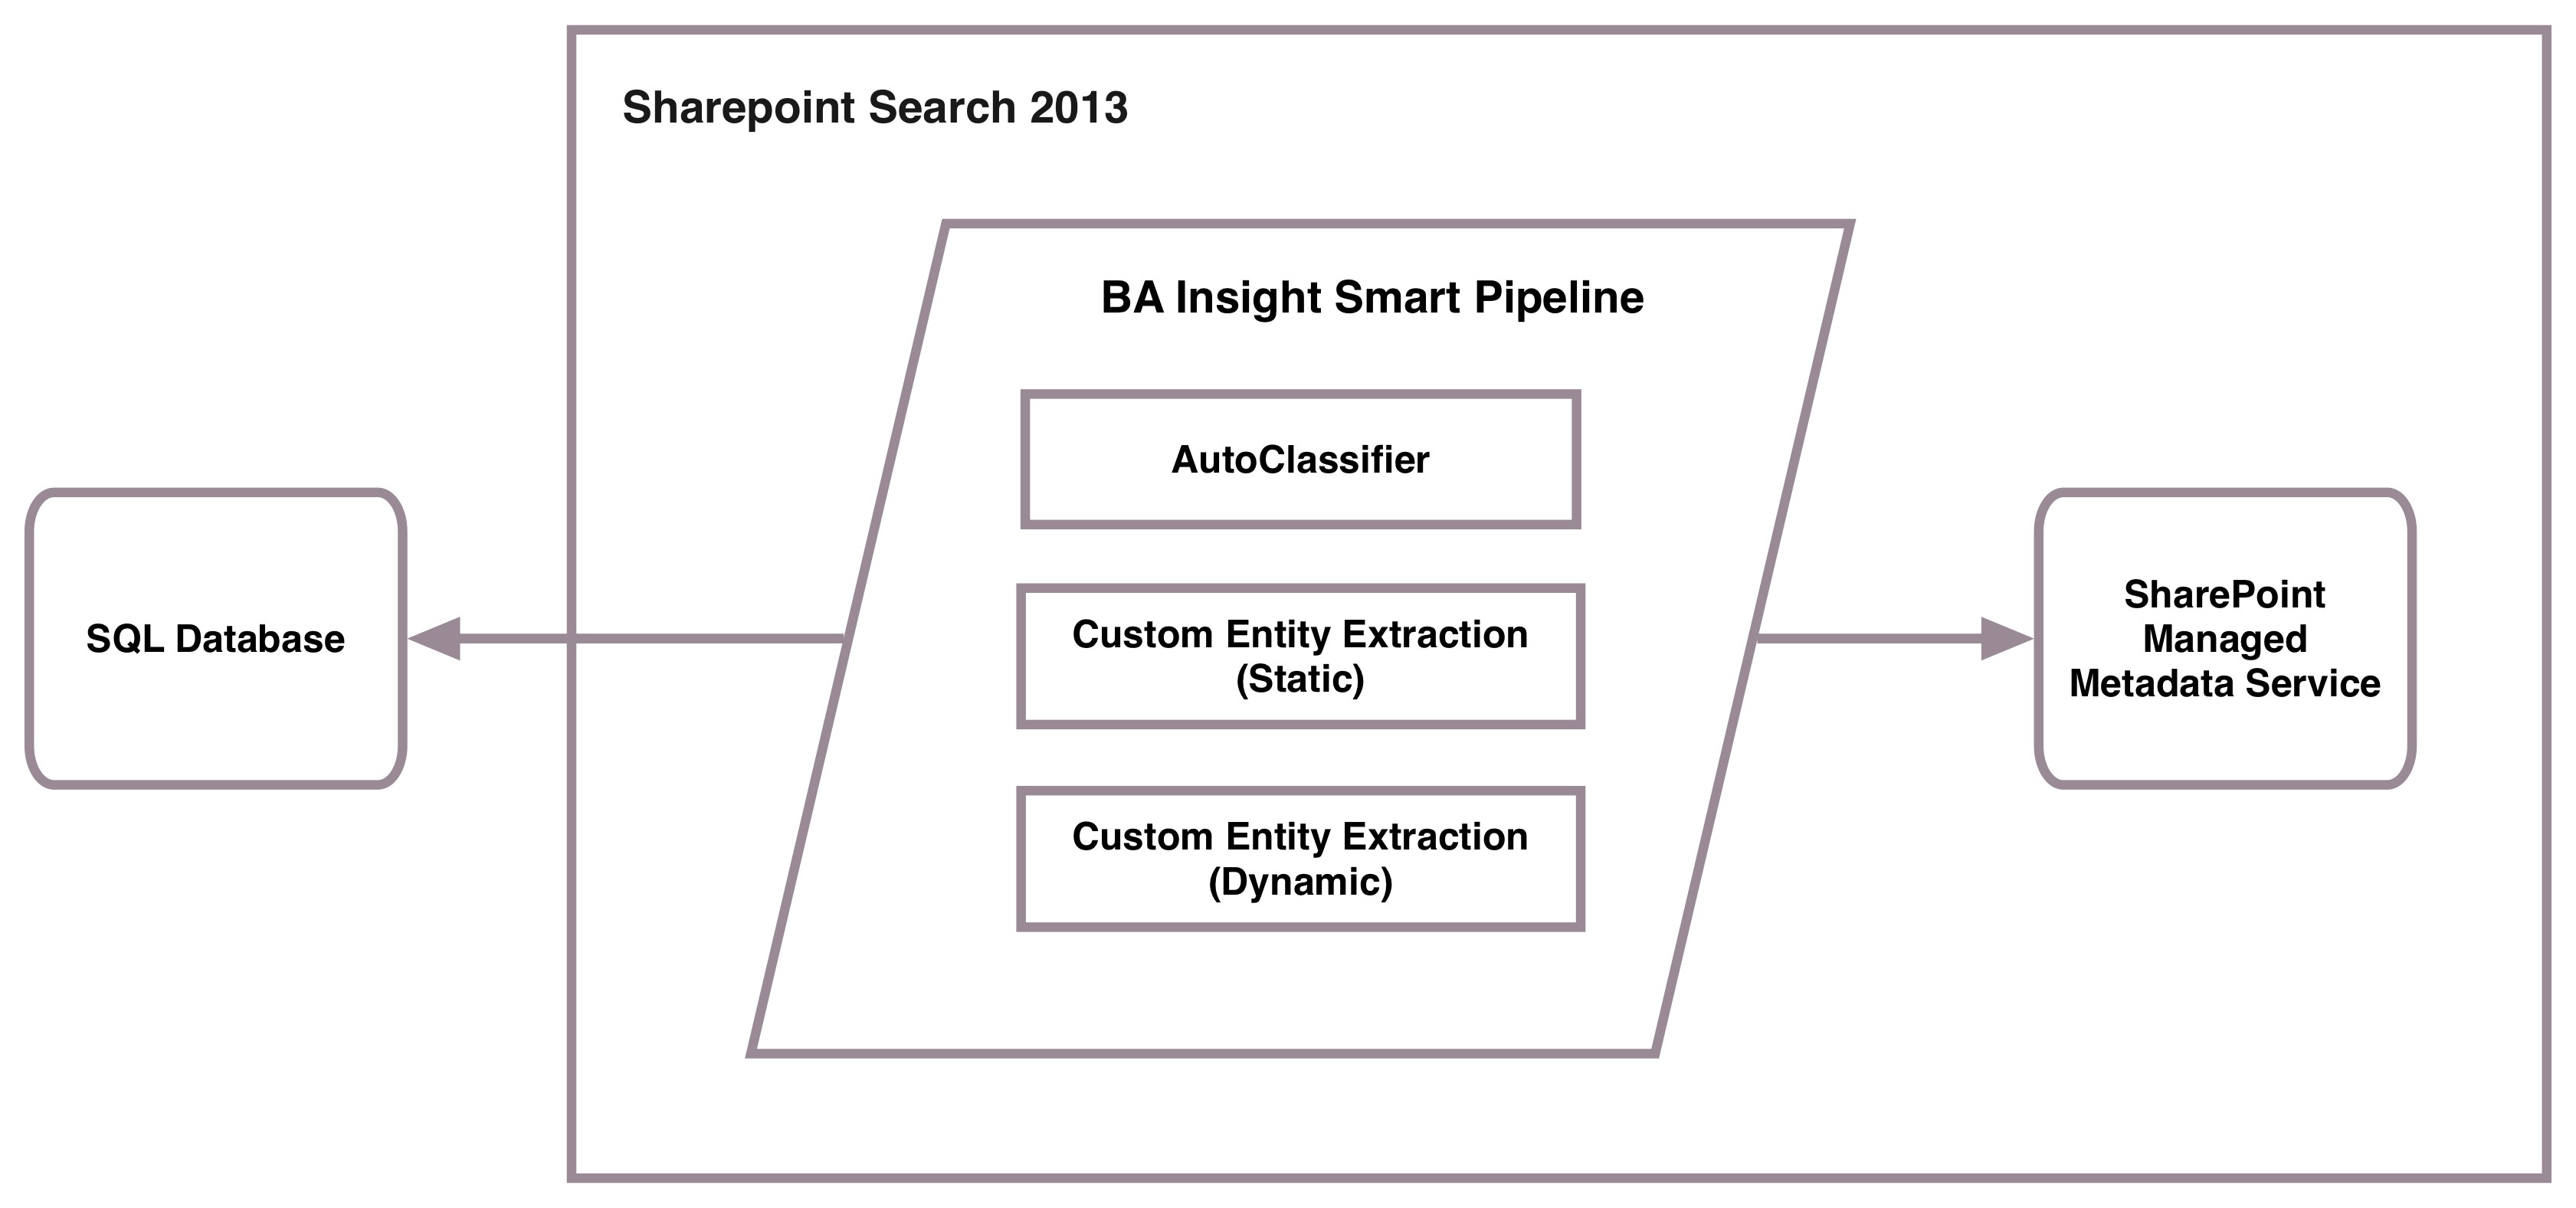
The Smart Pipeline components used in this protoype are: AutoClassifier (static) and static/dynamic Custom Entity Extraction. AutoClassifier used SharePoint MMS and Custom Entity Extraction using SQL for metadata.
Static Taxonomy Implementation
Browse to configure BA Insight AutoClassifier Service Application from Manage Service Applications list

Manage Taxonomies page
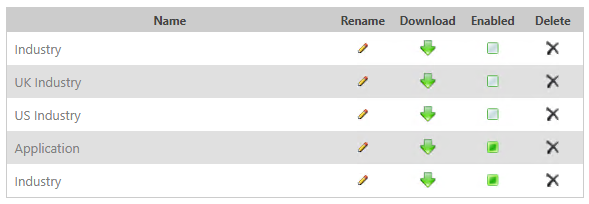
The top three taxonomies are used by each SharePoint application and the Application and Industry taxonomies which are enabled are used in the static tagging process. Clicking on each one of these we get:
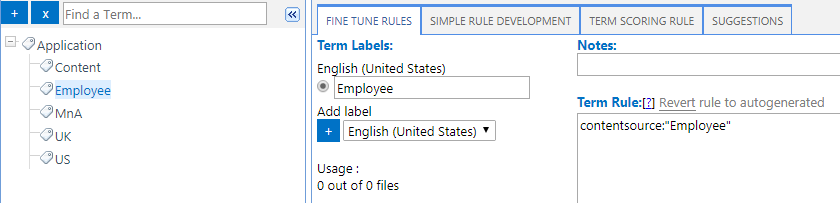
Application taxonomy
Content content source configuration – If the content source is “Content” and the path/url is not “mergers and acquisitions” then tag the application as “Content”.

MnA content source configuration- If the content source is “Content” and the path/url is “mergers and acquisitions” then tag the application as “MnA”.

The Employee, UK and US application taxonomies return the corresponding name when the contentsource property matches the application name.
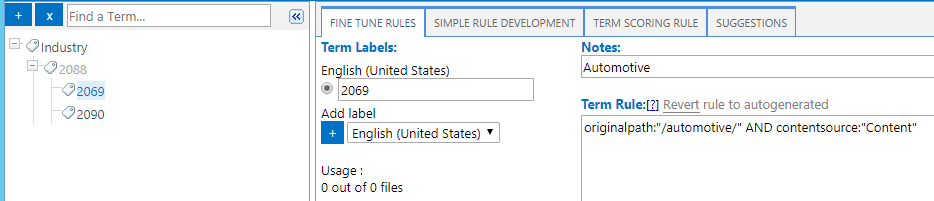
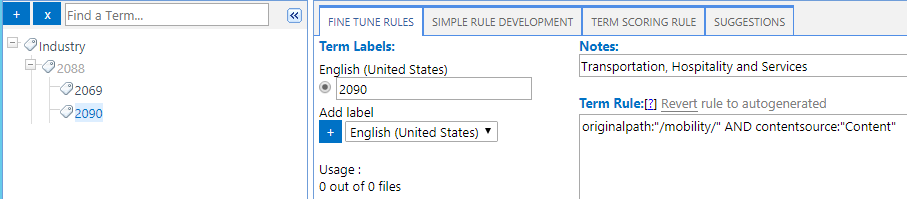
Industry taxonomy
Industry tagging configuration – If documents within the “content” contentsource have “/automotive/” in the path they will be tagged with the 2069 industry term Id
Industry tagging configuration – If documents within the “content” contentsource have “/mobility/” in the path they will be tagged with the 2069 industry term Id
AutoClassifier Content Enrichment Service Configuration
This is the place where you configure the BA Insight AutoClassifier to work with CEWS and the Smart Pipeline
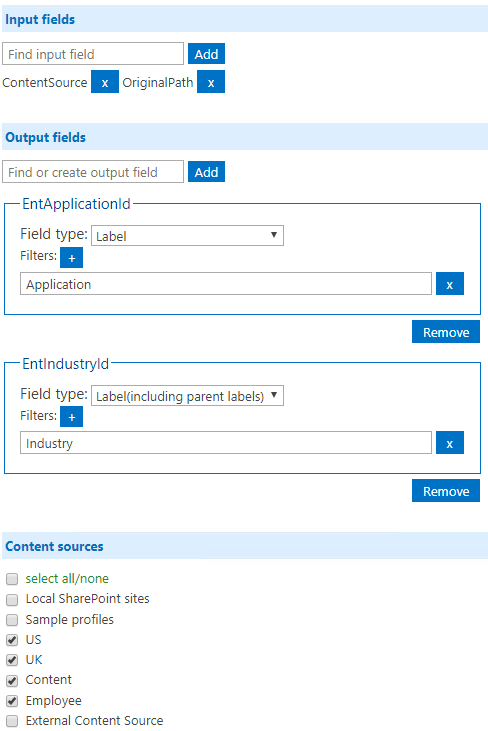
Input fields
- ContentSource – Field used in the AutoClassifier taxonomy term rule configuration
- OriginalPath – Field used in the AutoClassifier taxonomy term rule configuration
Output fields
- EntApplicationId – Property to tag the term rules to. Filter to only tag from the Application taxonomy.
- EntIndustryId – Property to tag the term rules to. Filter to only tag from the Industry taxonomy. Also added “including parent labels” to the Field type in order to ensure that the taxonomy full path is tagged to that property.
Content sources
- Select all sources that you want the AutoClassifier to be executed with.
Dynamic Taxonomy Implementation
Browse to configure Smart Pipeline Service Application from Manage Service Applications list

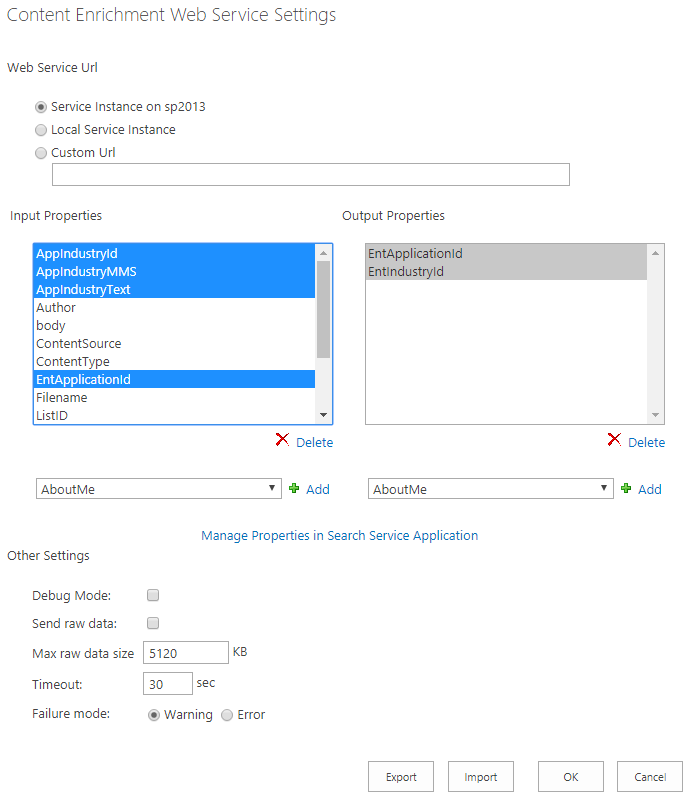
If not already there go to the Status page open “Search Service Application – Content Enrichment Settings” area and click on “Change” as shown below:

Add the following input and output properties in the popup as shown below:
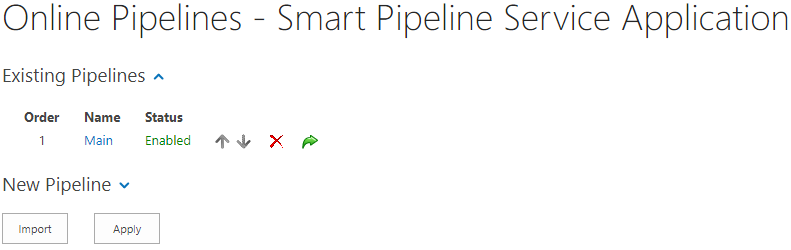
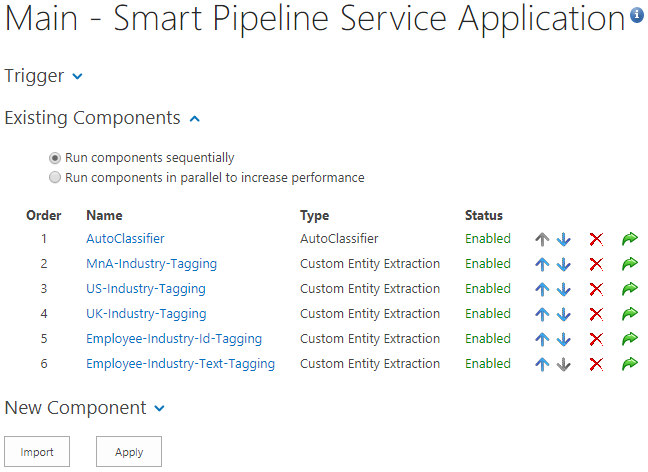
Go to “Online Pipelines” page and add an online pipeline if not already there. Ensure that it is enabled.
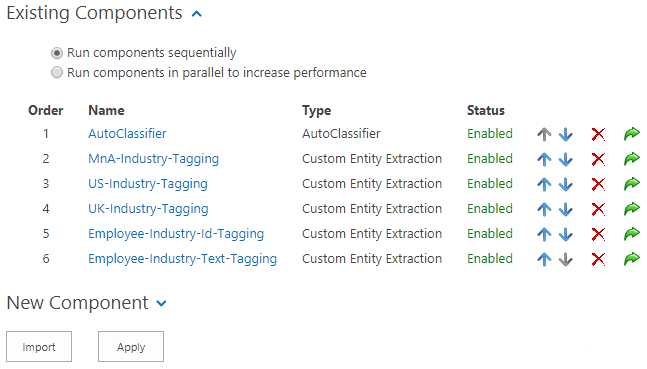
Click on the pipeline get to that pipeline component page like below. The final set of components are in this list and we will go through the addition and configuration of each now.
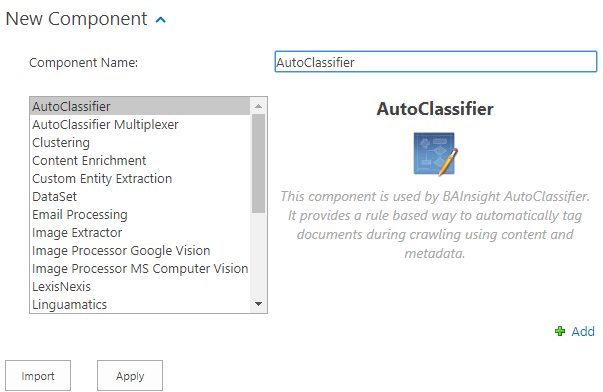
Add a new AutoClassifier component – Click on “New Component”, Select “AutoClassifier” in the list, give the component a name, click “Add” then “Apply”.
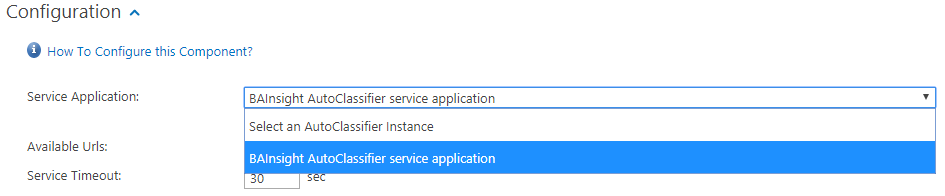
Click on the new AutoClassifier component to configure. Select the “BAInsight AutoClassifier” service application that we configured in a prior step then click “Apply”.
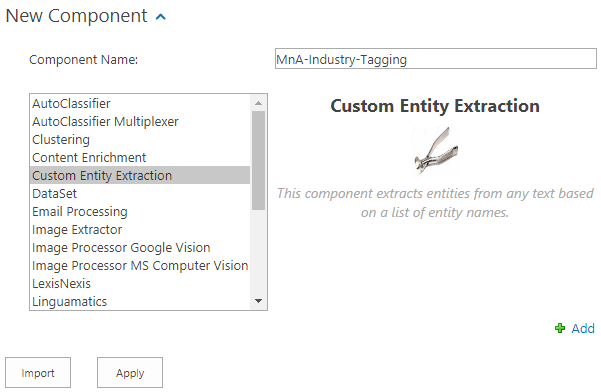
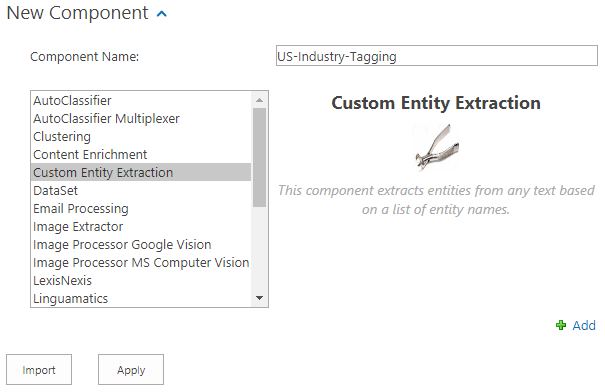
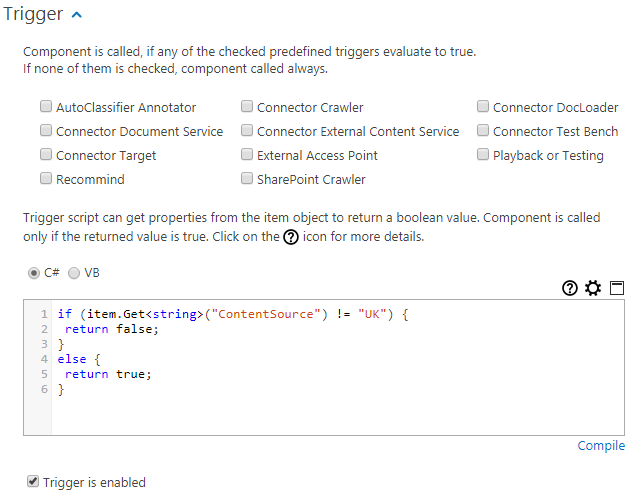
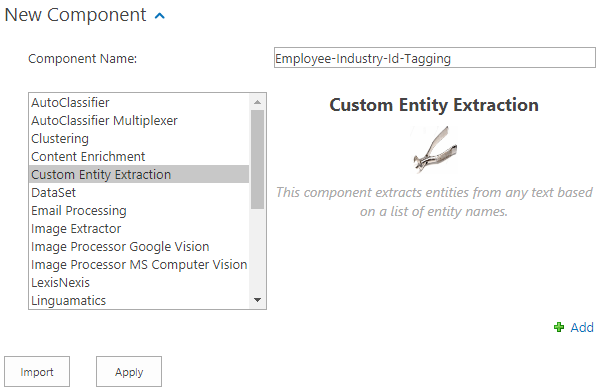
Add a new Custom Entity Extraction component – Click on “New Component”, Select “Custom Entity Extraction” in the list, give the component the next name from the component list in the initial step, click “Add” then “Apply”.
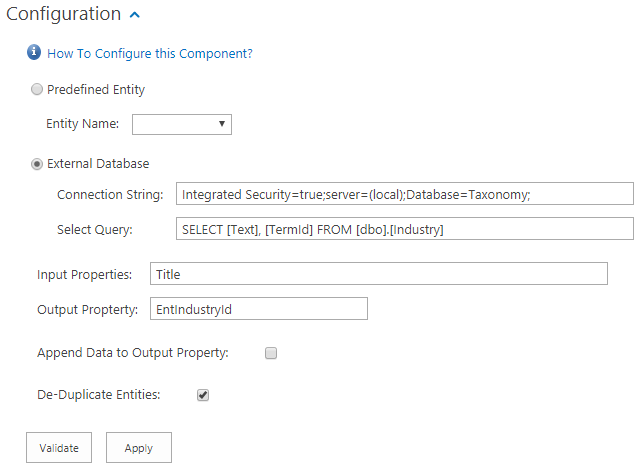
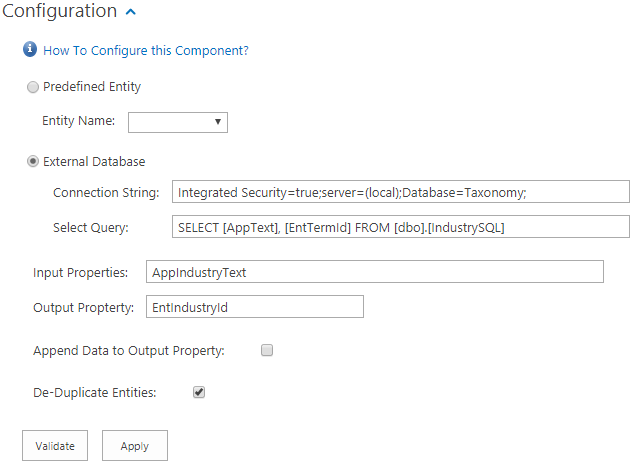
Click on the new Custom Entity Extraction component to configure. Click on the “Configuration” area and add the “External Database” info as described below:
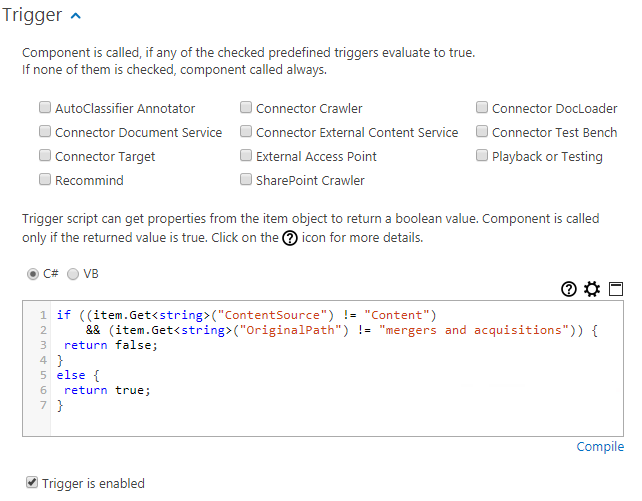
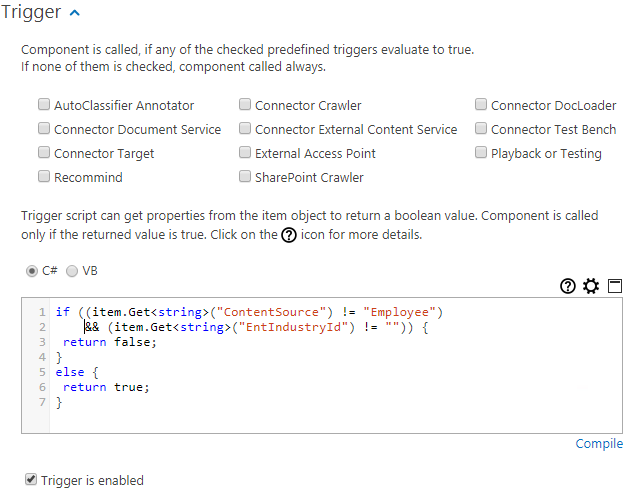
Click on the “Trigger” area, add the C# script and enable the trigger as described below:
Click “Apply” to save the component configuration.
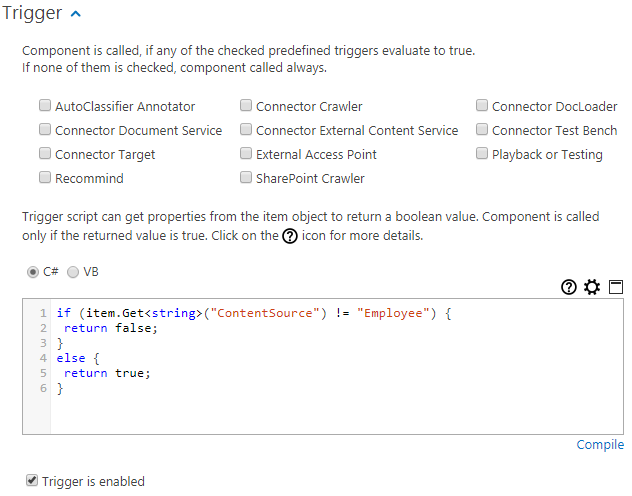
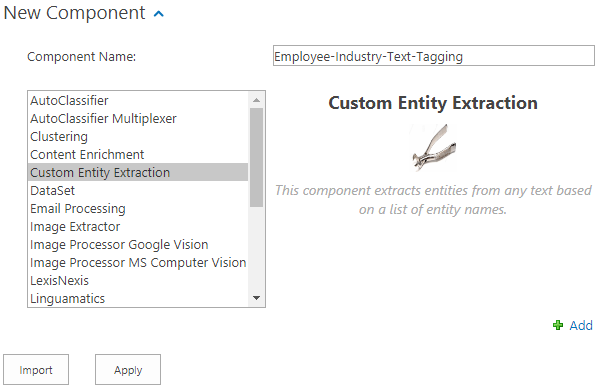
Add a new Custom Entity Extraction component – Click on “New Component”, Select “Custom Entity Extraction” in the list, give the component the next name from the component list in the initial step, click “Add” then “Apply”.
Click on the new Custom Entity Extraction component to configure. Click on the “Configuration” area and add the “External Database” info as described below:

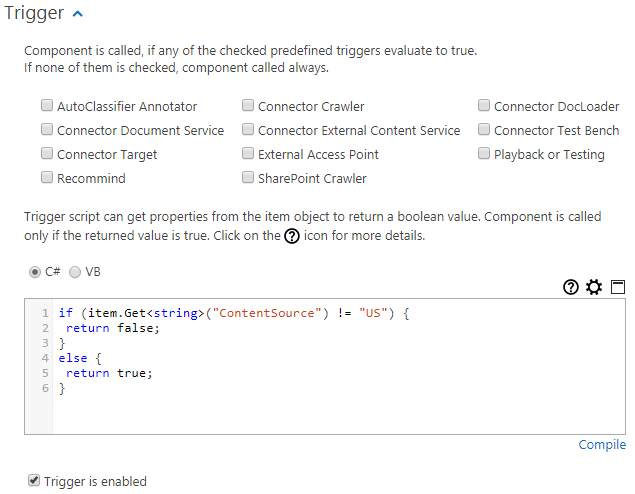
Click on the “Trigger” area, add the C# script and enable the trigger as described below:
Click “Apply” to save the component configuration.
Add a new Custom Entity Extraction component – Click on “New Component”, Select “Custom Entity Extraction” in the list, give the component the next name from the component list in the initial step, click “Add” then “Apply”.

Click on the new Custom Entity Extraction component to configure. Click on the “Configuration” area and add the “External Database” info as described below:

Click on the “Trigger” area, add the C# script and enable the trigger as described below:
Click “Apply” to save the component configuration.
Add a new Custom Entity Extraction component – Click on “New Component”, Select “Custom Entity Extraction” in the list, give the component the next name from the component list in the initial step, click “Add” then “Apply”.
Click on the new Custom Entity Extraction component to configure. Click on the “Configuration” area and add the “External Database” info as described below:
Click on the “Trigger” area, add the C# script and enable the trigger as described below:
Click “Apply” to save the component configuration.
Click on the “Apply” button to complete the implementation!
Next we will go through the content source crawls, some troubleshoot tips and the demo to prove that all of these steps worked.
